Pages

Tuesday, November 29, 2011

Best Whipped Cream--Ever!

My favorite holiday secret weapon in the kitchen?  My iSi Cream Whipper!  It never fails that when I serve this whipped cream my "taste testers" R-A-V-E about it! 

Plus it's a cool, cool gadget (pardon the pun :) ).

I have the Mini Whip, which holds 1/2 pint of cream.  Don't be misled by the "mini"--according to the iSi website, it makes
about 2 1/2 cups of whipped cream.  I'll trust the folks at iSi on how much it makes, because I've never run short.
 2 1/2 cups of whipped cream is a lot of {DELICIOUS} whipped cream.

With these yummy ingredients, how can it not be DELISH???
Here's the "recipe":
1 pint whipping cream
2 tablespoons powdered sugar
1/2 teaspoon vanilla

Add all ingredients to the container.

If you would rather serve CHOCOLATE WHIPPED CREAM (!!!)
simply add 2 tablespoons Hershey's Cocoa Powder to the recipe above,
and you have a delicious mousse!

The secret is in the "chargers"--that give the cream its volume.
(And I DO mean secret--I don't know what the chargers contain, but they surely do the trick!)

And it really IS this easy...
1 - Add your ingredients
2 - Attach the charger (and the spout)
Well...there is one more step--shake a few times, and...
3 - ...Serve!
Serve and impress!

Now, wouldn't you just LOOOVVVE to find one of these under the Christmas tree this year?
Or better yet, why not gift it to yourself before the holidays, so you can use it at every party?

Thanks for stopping by.  Please leave me a comment to let me know you were here—I read every single one of them!  They encourage me and inspire me.  And if you like what you see a lot J, maybe you’d like to +1 this post too!  Thank you!

I will be joining these fun parties; please stop by to see all the great things there!
 Carrie’s Amaze Me Monday at http://dittledattle.blogspot.com/
 Home Savvy A to Z Monday party at http://www.homesavvyatoz.com/savvy-homemade-monday-13/
 Susan’s Metamorphosis Monday at http://betweennapsontheporch.blogspot.com/
 Motivated Monday at http://becolorful.typepad.com/  
 Debbie’s Newbie Party on Monday at http://debbie-debbiedoos.blogspot.com/
 Marty's Table Top Tuesday at http://astrollthrulife.blogspot.com/ 
 Kim's Wow Us Wednesdays at http://savvysouthernstyle.blogspot.com/ 
 Open House Party Thursday http://nominimalisthere.blogspot.com
 Courtney’s, Feathered Nest Friday at http://frenchcountrycottage.blogspot.com/
 Honey's Potpourri Friday at http://twenty-eight-0-five.blogspot.com/
 Inspiration Friday at http://www.atthepicketfence.com
 Show and Tell Friday at http://romantichome.blogspot.com/
 Five Minutes Just for Me ar http://5minutesjustforme.blogspot.com/
and

Monday, November 21, 2011

Pomander Tutorial

In Medieval times pomanders were small vessels filled with musk and other scents that were carried or worn, in the belief that they would ward off infection and to mask odors.  Later, Colonial housewives used fruit to make them to scent their homes.
Today, in a world of artificial scents from sprays, candles, and oils, the Colonial version of pomanders is a wonderful, natural alternative.  Their citrus/spicy scent is parrticulalry nice during the Christmas holidays, and they make lovely gifts for teachers, neighbors, and your favorite barista at Starbucks, but don't wait until the last minute to make them, because they require one or two weeks of drying time.  Once dried/cured, they will last for several years.

ITEMS NEEDED TO MAKE POMANDERS:
    *  Oranges, apples, and/or lemons
    *  Cloves (Amount depends on how many  you are making.  They can be purchased in bulk,
         but I had plenty left in the small can I used to make 9 pomanders.)
    *  Ice pick, toothpick, or other pointed tool
    *  Zester/scorer tool (mine is from Pampered Chef and it works beautifully)


You might want to mark your design where the cloves will go.
Depending on the size of your cloves, you will make the holes large enough to make them
easy to insert, but not so large that they won't stay in.

You can also use a zester/scorer to make interesting designs before adding the cloves.
I like to save the zest "tendrils," because they will add interest to the final display.

Set the finished pomanders in a cool, dry place for one to two weeks.
In colder climates the screend porch is a good place unless
it gets too cold, as they shouldn't freeze. 
The garage is also a good option.

The items I used for the arrangement were things I already had around the house:
Fitz and Floyd bowl (pattern unknown);
A small pinecone-and-greenery arrangement in a red votive cup I made a year or two ago;
Miscellaenous pieces of greenery and pinecones;
Battery-operated candles.

These pomanders aren't dry yet, but I couldn't resist the urge to see the finished product, so I put it
together then dismantled it to allow them to dry before I put the arrangement together again.
If you look carefully you will see battery-operated votives tucked in the arrangement,
which adds a lovely glow.
Have you ever made pomanders?  How long did they last?  I'd love to hear how they were received if
you gave them as gifts.

Thanks for stopping by.  Please leave me a comment to let me know you were here—I read every single one of them, and they encourage me and inspire me.  And if you like what you see a lot J, maybe you’d like to +1 this post too!  Thank you!

I will be joining these fun parties; please stop by to see all the great things there!
The Tablescaper's Seasonal Sunday at http://thetablescaper.blogspot.com/
Carrie’s Amaze Me Monday at http://dittledattle.blogspot.com/
 Susan’s Metamorphosis Monday at http://betweennapsontheporch.blogspot.com/
 Motivated Monday at http://becolorful.typepad.com/  
 Debbie’s Newbie Party on Monday at http://debbie-debbiedoos.blogspot.com/
 Marty's Table Top Tuesday at http://astrollthrulife.blogspot.com/ 
 Kim's Wow Us Wednesdays at http://savvysouthernstyle.blogspot.com/ 
 Susan's Tablescape Thursday at http://betweennapsontheporch.blogspot.com/
 Open House Party Thursday http://nominimalisthere.blogspot.com
 Courtney’s, Feathered Nest Friday at http://frenchcountrycottage.blogspot.com/
 Honey's Potpourri Friday at http://twenty-eight-0-five.blogspot.com/
 Inspiration Friday at http://www.atthepicketfence.com

Sunday, November 13, 2011

Bejeweled Thanksgiving

This past summer I was on Cloud Nine when I found a set of 8 beautiful Limoges plates at Powell Antiques close to home.  And now...[drumroll please]....here they are!  Their debut to Blogland!


Eight plates, two of each of four patterns.
Through my research I can't find a pattern name...
I'll name them EXQUISITE--aren't they?


My first thought was the expected thought--"I can't wait till Easter/spring to use them!" Then other fall and Thanksgiving posts using non-fall china challenged me to use them NOW!

The inspiration finally came--from the most unexpected place and item:  Kroger Marketplace & bargain placemats in a BEAUTIFUL, RICH, SHIMMERY purple!

OK...I'm making this a smmmmaaaalll picture, because, REALLY?! $.79 placemats for LIMOGES?!!

But I love them!  I love that they're shimmery and a beautiful shade of purple, or...
let's call them AUBERGINE--that makes them FANCY!
I already have aubergine napkins that I blogged about and how they came into my life HERE.  Though they're not the exact shade, I now have the placemats to work with too!


Here's the table:

I decided to create a second runner with the placemats by layering them on top of the gold linen runner,
 and not use them at all four place settings.
The centerpiece is the last HURRAH for the roses I dried from our son's wedding HERE.  I got
a month's worth of enjoyment and lots of pictures/memories from those beautiful roses.


Instead of traditional placecard holders I used our Lenox Eternal cream soup bowls with a dried rose at each place.
Amazingly, the colors of the dried roses were perfect for the setting!


The layers:
Lenox Eternal charger
Limoges dinner plate
Heritage (by Federal) Depression glass salad plate
Lenox Eternal cream soup bowl and and stand/plate


Dried Wedding Roses and Crystal
(Berwick juice/cocktail cups)


Color is so amazing, isn't it? Same dishes, yet the setting looks so different
with different backgrounds.
The Heritage salad plate not only adds texture, but it also plays with the
colors of the Limoges plates.


And finally...the LIMOGES plates.  Ta-dah!


Coffee service at the china cabinet/buffet~
Lenox Eternal cups and coffeepot
1847 Rogers Brothers Columbia silver spoons--a {WONDERFUL} hostess gift from my SIL
Crystal server bowl...pattern not known.  (Can anyone help me on that?)
Vintage napkins from my linen collection.


Other pieces:
Water goblets ~ Pottery Barn
Wine goblets ~ Pristine, by Reizart/Gorham
Gold linen table runner with velvet trim ~ Pottery Barn
Gold linen tablecloth ~ Don't remember
Gold flatware ~ gift from my dear grandmother, years ago
Oval s/p tray ~ GW find
Brass candlestick ~ Baldwin Brass
Crystal candlesticks ~ Various/unknown

So...was I able to convert my spring Limoges to fall?
Would you like to be invited to this Thanksgiving table? (I'd love to have you visit!)


Thanks for stopping by.  Please leave me a comment to let me know you were here—I read every single one of them!  They encourage me and inspire me.  And if you like what you see a lot J, maybe you’d like to +1 this post too!  Thank you!

I will be joining these fun parties; please stop by to see all the great things there!
The Tablescaper's Seasonal Sunday at http://thetablescaper.blogspot.com/
 Carrie’s Amaze Me Monday at http://dittledattle.blogspot.com/
 Home Savvy A to Z Monday party at http://www.homesavvyatoz.com/savvy-homemade-monday-13/
 Susan’s Metamorphosis Monday at http://betweennapsontheporch.blogspot.com/
 Motivated Monday at http://becolorful.typepad.com/  
 Debbie’s Newbie Party on Monday at http://debbie-debbiedoos.blogspot.com/
 Marty's Table Top Tuesday at http://astrollthrulife.blogspot.com/ 
 Kim's Wow Us Wednesdays at http://savvysouthernstyle.blogspot.com/ 
 Susan's Tablescape Thursday at http://betweennapsontheporch.blogspot.com/
 Open House Party Thursday http://nominimalisthere.blogspot.com
 Courtney’s, Feathered Nest Friday at http://frenchcountrycottage.blogspot.com/
 Honey's Potpourri Friday at http://twenty-eight-0-five.blogspot.com/
 Inspiration Friday at http://www.atthepicketfence.com

Saturday, November 12, 2011

Bombay Co. is Alive!


In my Thanksgiving Dress Rehearsal post HERE, I mentioned that I have many pieces from Bombay Co. and how I miss that store.  I received comments from others who also miss it.

So today I go to a Kroger Marketplace, and as I browse through their housewares I immediately recognize the tan and white stripe and BOMBAY lettering in a large vignette!

Was I happy, or was I sad?  I was happy to see that the company is still alive, but sad that it would be in a Kroger.  Remember how pretty their stores at the mall were?  According to their website, they are also found at Fred Meyer and through QVC.


Do you remember the logo/the lettering?  It looked so familiar to me; I was surprised that I remembered it so well.

No doubt about it--some of the pieces were pretty.  This silk orchid was beautiful.
I think it was around $40.
I liked this chicken-wire cloche with the rustic bowl a lot.
It was only about $14.
I'll be thinking about it, and one day I'll just have to jump in my car
AND BRING IT HOME! 
If I don't,...come Easter I'll be very sorry.....
And how about this pretty one for only $12?!  The box behind it was lovely; it looks like
a book, but it's a box for saving pretty things.  Yes, that might need a GOOD home too.
They also had furniture--at VERY reasonable prices.  They looked
pretty enough.
Remember they always had nice accent tables?
Still do.
Some of their tables and bookcases, etc.


They also had nice Christmas decorations.  I especially liked these deer candle holders.
I think they were $40 each.


Recently I needed nice place cards--not the tent type.  Could not find them, and I didn't have time
to look for them online.
These Bombay ones, which I bought when they were closing their stores, are my favorite ones--
rounded corners and gold edge.


So, please tell me--do you remember the "old" Bombay?  Do you miss it?
Are you sad that it's at Kroger now, or are you happy to know they're
still in EXISTENCE?

Thanks for stopping by.  Please leave me a comment to let me know you were here—I read every single one of them!  They encourage me and inspire me.  And if you like what you see a lot J, maybe you’d like to +1 this post too! 
Thank you!

I'll be joining lots of parties, as you'll see below, because I suspect many bloggers will
want to know about the resurrected Bombay.  Especially, I'll be joining Susan's
Monday Metamorphosis because that's exactly what's happened at Bombay!

Please stop by to see all the great things at these fab blogs:
The Tablescaper's Seasonal Sunday at http://thetablescaper.blogspot.com/
Carrie’s Amaze Me Monday at http://dittledattle.blogspot.com/
 Susan’s Metamorphosis Monday at http://betweennapsontheporch.blogspot.com/
 Motivated Monday at http://becolorful.typepad.com/  
 Debbie’s Newbie Party on Monday at http://debbie-debbiedoos.blogspot.com/
 Marty's Table Top Tuesday at http://astrollthrulife.blogspot.com/ 
 Kim's Wow Us Wednesdays at http://savvysouthernstyle.blogspot.com/ 
 Susan's Tablescape Thursday at http://betweennapsontheporch.blogspot.com/
 Open House Party Thursday http://nominimalisthere.blogspot.com
 Courtney’s, Feathered Nest Friday at http://frenchcountrycottage.blogspot.com/
 Honey's Potpourri Friday at http://twenty-eight-0-five.blogspot.com/
 Inspiration Friday at http://www.atthepicketfence.com 

Thursday, November 10, 2011

Chocolate/Peanut Butter Chex Party Mix

Our baby granddaughter, Ava, turned 4 on Saturday.  To celebrate (and help Mom out), I offered to make a Chex Mix for her kiddie party.  I saw Mary's recipe for a Halloween version of Chex Party Mix HERE, and that started me thinking...

But first things first.  I'm her grandmama, so I HAVE to  share a picture of the party girl first.

Now do you understand why we're crazy nuts in love with her?  :)


Okay, on to the recipe...

So while at the store I decided that chocolate and peanut butter would be yummy, so I ended up making my own recipe based on Mary's as a guide, and it was a hit!

Ingredients:

6 cups Rice Chex cereal
1 cup Toll House/Nestle dark chocolate morsels
1 cup Reese's peanut butter chips
1 cup Reese's Pieces
(You could use M&Ms in the "right" color for the given holiday, but Reese's was perfect for a fall party.)
1 can mixed nuts
2 cups mini pretzels, broken in half

  • Line 2 cookie sheets with foil or wax paper
  • In a bowl large enough to hold 3 cups of the Rice Chex melt the chocolate morsels in the microwave for about 1 1/2 minutes on High.
  • Stir the chocolate to make sure it's completely melted.  Microwave in 15-second increments if it's not.
  • Add 3 cups of the Rice Chex to the melted chocolate, and mix carefully, using a spatula until the cereal is well covered.
  • Spread chocolate-covered cereal in a single layer on one of the cookie sheets, and refrigerate for at least 5 minutes, or until well set.


  • Follow the same steps with the peanut butter chips, using the remaining 3 cups of Rice Chex.


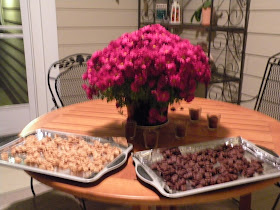
It was cold enough out that I was able to set them out on the screened porch, instead of
shuffling things around the refrigerator.

  • When the chocolate and peanut butter are well chilled, break them up into bite-size pieces into a large bowl.
  • Add the Reese's pieces, nuts, and pretzels to taste.  Mix well.
  • Serve or store in airtight container.


¡Buen provecho! (that's bon appétit in Spanish, which is what we say at our house before every meal.) 

Tell me, do you follow recipes to the letter, or do you use them as a guide and let your imagination (or what’s in your pantry) run free?

Thanks for stopping by.  Please leave me a comment to let me know you were here—I read every single one of them, and they encourage and inspire me.  And if you like what you see a lot J, maybe you’d like to +1 this post too!  Thank you!

I’m joining the following parties; please visit them.